
Finding cool, unique gifts can be tricky. At this point, you might be feeling the crunch! Not only do you want to find a gift that your loved one or special someone will like—the greater challenge lies in finding something that will stand the test of “that’s a GREAT gift!” time.
Well, we have an easy solution that will set you out as the gift-giving guru this season. Creating a Corian® (or other solid surface material) cutting board is a personal, thoughtful and unique way to bring a smile to your loved one’s face.
Who Doesn’t Like A Custom Gift
The first step is to decide on a design for the cutting board or trivet. Consider creating a custom design that reflects a favorite shape or hobby of your gift recipient. You can also create a design that reflects a popular or regional shape (like a specific tree leaf, animal or activity) or one that will remind them of the season itself (like a snowman or Christmas tree ornament.)
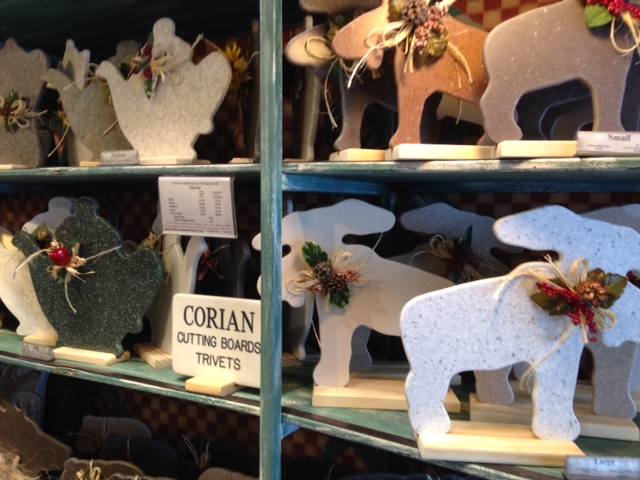
Whatever your design, one thing is for certain, using any solid surface material like Corian® will ensure you are creating a quality cutting board that is not only beautiful, but also durable. All solid surface material is non-porous, so your gift recipient will never have to wonder about bacteria getting trapped on the surface. Solid surface material also provides a more resilient surface for cutting on than plastic or wood, which can often sustain deep, permanent cuts. To the contrary, scratches and cuts can be easily sanded out of its surface. Plus, your lucky gift recipient will also soon realize numerous other benefits to owning a solid surface cutting board or trivet, such as being dishwasher safe and heat and stain resistant.
Let’s Get Started!
As you will see, creating a custom cutting board out of solid surface material is an easy way to give your loved one or that special someone a unique gift they are sure to cherish. Get started by following these few simple steps:
STEP 1: The first step is to create a template for the design. You can create a template in a couple of ways. One is to take a piece of cardboard and create a template of the desired shape and draw an outline of the shape onto the solid surface material. The second way is to create a more substantial template out of solid wood, particleboard or MDF (medium density fiberboard.) Sand the edges of the template to ensure there aren’t any bumps, as you will be using this edge to guide the ball bearing collar on the router. Attach this template to the piece of solid surface with dabs of hot melt glue or use this template to draw an outline of the shape onto the solid surface material.
STEP 2: If you have it, use a router with a ball bearing collar or guide and a carbide bit to rough cut out the desired shape from the solid surface (the collar will rest against the template and enable you to maneuver with more accuracy around the attached template.) The optimal method would be to cut the shape out with a jig saw within 1/8” of the template edge. This will allow you to then dress the shape out with the router bit.
Although it’s not the preferred method, if you don’t have a router you can also use a jig or scroll saw to cut out the entire shape—you will just have more sanding to do in order to smooth out the rough cut edges.
STEP 3: Determine what you want your finished edges to look like. If you are creating a cutting board or trivet with straight-line edges, you could add a rounded or beveled edge. If your design is more intricate (like an animal silhouette or shaped object) you will most likely want to just sand the edges smooth or slightly round them.
STEP 4: (Optional) Add a creative flourish to your cutting board or trivet by engraving a special message or adding a contrasting inlay. You can accomplish this by using a router with a 1/4” diameter bit to carefully scroll through the surface of the material (as if writing), making a groove. You can also clean out the groove and apply a different colored solid surface adhesive for contrast. For example, if the solid surface material you chose was white or cream, you could slightly overfill (to allow for shrinkage) the groove with a red or green adhesive. Once the filled adhesive has dried, rough sand the surface smooth with 180 grit sandpaper and a random orbit sander and move on to Step 5.
STEP 5: Put the finishing touch on your gift by sanding and polishing the cutting board or trivet surface to the desired finish. Start out by sanding the surface with 280-grit sandpaper, switching to a 400-grit to achieve a smooth semi-gloss finish. For a high-gloss finish, follow up with 600-grit and 1,000-grit sandpaper. Lastly, apply an automotive polish with a 200-grit polishing compound to put the final touches on your high gloss surface.
With a little bit of creativity and thought—while following the five steps we’ve laid out above—you’re bound to create a unique gift that will impress your loved one or special someone for years to come.
Happy Holidays from the entire SolidSurface.com family to yours!