Tag Archives: solid surface

Formica Noce Travertine

Formica Corporation Introduces 13 New Patterns to Solid Surfacing Collection

Formica Corporation, a global leader in surfacing design and innovation, has introduced 13 new Formica solid surfacing patterns, adding a new range of quartz-like patterns and some contemporary shimmer to the brand’s collection of smooth, seamless and nonporous solid surfacing products.

“We first introduced the Colorbox concept in 2010 to visually demonstrate how different surfacing materials, colors, textures and patterns can work together in commercial interiors”

Formica Corporation’s design team styled the latest patterns to coordinate with a variety of Formica® brand surfacing products, a concept dubbed Colorbox. “We first introduced the Colorbox concept in 2010 to visually demonstrate how different surfacing materials, colors, textures and patterns can work together in commercial interiors,” said Gerri Chmiel, Formica Corporation’s senior design manager. “The Colorbox concept allows the architecture and design community to confidently pair Formica® Solid Surfacing products with complementary high pressure laminate offerings.”

The 2013 Formica® Solid Surfacing introduction includes:

Luna – A small-scale, usable quartz-like pattern available in a full color range to coordinate with the brand’s recent high pressure laminate introductions.

  • 773 Luna Sail White – soft, warm white
  • 774 Luna Fossil – pale blue-green
  • 775 Luna Storm – cool, dark gray
  • 780 Luna Stone – mid-tone, warm taupe
  • 781 Luna Concrete – mid-tone, cool gray
  • 782 Luna Weather – dark, warm gray

Quartz – A larger-scale, quartz-like pattern with metallic particulates for added shimmer and depth.

  • 770 Bottle Glass Quartz – inspired by the colors of recycled glass, the bright white ground features large particulates of blue, brown and gray
  • 771 Café Quartz – soft caramel with large blue, translucent and metallic copper particulates
  • 772 Copper Quartz – warm gray with large white, gray and metallic copper particulates

Sparkle – Subtle, reflective white and gray architectural colors provide a contemporary alternative to basic solids.

  • 778 White Sparkle – warm white with a metallic dusting of cool silver mica
  • 779 Gray Sparkle – cool gray with a metallic dusting of cool silver mica

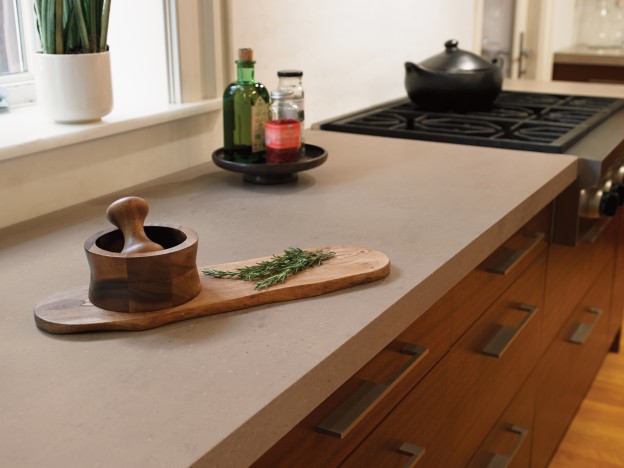
Travertine – Softly patterned Noce Travertine remains a staple in commercial and residential interiors alike, but the softness of the stone renders it difficult to use on horizontal surfaces. Noce Travertine offers the look of real travertine, with the durability of Formica® Solid Surfacing.

  • 777 Noce Travertine – a perfect blend of warm and cool; warm brown ground swirls with veins of cool gray and dark brown; gray and white particulates add interest and depth

Mirage – Tried and true speckled pattern introduced in new trend color of gray; rust brown warms the overall color

  • 773 Mirage – gray with warm rust-brown particulates

Chmiel revealed that the practice of mixing and matching of materials in commercial settings plays an important role in the company’s product development process. “One project incorporates countless surfacing materials, and we strive to introduce trend-forward, usable products that are desirable on their own, yet work well in unison to help designers achieve a desired design aesthetic. The usability and compatibility of these 13 new patterns underscores our commitment of being a design resource for our customers.”

Formica® Solid Surfacing is GREENGUARD Indoor Air Quality Certified® by the GREENGUARD Environmental Institute under the GREENGUARD Standard for Low-Emitting Products, including the requirements for Children & Schools.

About Formica Corporation

Founded in 1913, Formica Corporation, part of the Formica Group of companies, is a leader in the design, manufacture and distribution of innovative surfacing products for commercial and residential applications. For more information about Formica Corporation, its products, special programs and promotions, visit www.formica.com or call 1-800-FORMICA™.

About Formica Group

Formica Group is a global group of companies consisting of Formica Canada Inc., Formica Corporation, Formica de Mexico S.A. de C.V., Formica IKI Oy, Formica Skandinavien AB, Formica Limited, Formica S.A., Formica S.A.S., Formica Taiwan Corporation, Formica (Thailand) Co., Ltd., Formica (Asia) Ltd. and Homapal GmbH, among others. The Formica Group of companies is part of the Laminates & Panels division of Fletcher Building.

Please Note: 
Formica®, and the Formica® Anvil Logo are registered trademarks of The Diller Corporation.
1-800-FORMICA™ and Etchings™ are trademarks of The Diller Corporation. 
©2013 The Diller Corporation 
A Fletcher Building Company

Contacts

For Formica Corporation Laura Phillips, 513-325-9985 lphillips@vehrcommunications.com

Tips for Successfully Seaming Corian® & Other Solid Surface Brands

Integra Adhesives

Integra Adhesives

Have you ever spent hours correctly measuring, cutting and fitting pieces of Corian® or other solid surface material together, only to have your seams fail? If you have, then you know how frustrating this can be!

How do you avoid this? The key is to keep your solid surface adhesive live and performing throughout the fabrication process. Here are some highly effective strategies for storing and applying adhesive to ensure the best possible performance and seaming success:

Adhesive Care

  • Store adhesive upright in a cool dry place that is away from direct sunlight.
  • Store adhesive in an air-conditioned room or a refrigerator designed for the storage of flammable products to extend its shelf life. (NOTE: Do not store adhesive alongside food.)
  • Store upright to allow any trapped air bubbles to reach the top (outlet) of the cartridge and be eliminated during the initial purge. To purge, hold the cartridge at an upward angle, mixing tip NOT attached, and dispense approximately a tablespoon into a disposable container like a paper cup. Make sure you see adhesive dispensing from both sides of the cartridge.
  • Do not use the adhesive if it has been exposed for an extended period to high temperatures during transport or storage. In this situation, the activator (catalyst) may break down and lose strength.
  • High temperature decomposition of the activator can also release gasses into the activator component, which may impact the consistency of the cure, leaving uncured spots.

If stored correctly the adhesive can last for a year. However, the activator portion will slowly lose reactivity over time. If in doubt, run a test by dispensing a ¼” bead on cardboard and if a slow, uneven or incomplete cure results, discard the adhesive.

In addition to properly caring for your adhesive, following these eight performance guidelines will help ensure successful seaming during your fabrication process:

Performance

  • Allow both the adhesive and solid surface sheet material being joined to reach a room temperature of at least 60 degrees Fahrenheit (18 degrees Celsius) before assembling.  Bringing material into a warm humid room after being cold can cause moisture to condense on the surface, which can interfere with bonding.
  • Fabricating cold sheets in a warm room will cause the adhesive on the edge of the joint to cure faster than the adhesive deep in the joint. This is because cold solid surface materials absorb a significant portion of the energy from the chemical reaction, resulting in less than optimal curing conditions. This can ultimately cause a weakening of the seams in those areas. It is best practice to let the sheets reach room temperature.
  • Another reason to allow cold adhesive to return to room temperature before use is that some adhesive components become thicker at low temperatures. This creates higher pressure that may flex the cartridge wall and throw off the mix ratio.
  • If you re-warm adhesive, make sure the cartridge outlet plug is in place rather than the mixing tip. Adhesive left in the tip will warm faster and may expand back into the activator chamber where the two components will harden and result in a plugged cartridge.
  • Never expose adhesive to high heat. Warming adhesive above 110 degrees Fahrenheit can damage the activator component.
  • When gluing pieces together, run two small beads (one over the other) instead of a larger single bead. Overlapping adhesive streams will greatly reduce the possibility of under cured areas caused by air bubbles, from the activator side of the cartridge, mixing in with the base component in place of activator.
  • Use the full stroke of the trigger to maintain a smooth and constant feed pressure. Quickly re-trigger the gun and continue this technique until dispensing is complete. This application technique will help to prevent adhesive from seeping out of the tip between strokes. Using a dripless adhesive gun is also beneficial.
  • Apply as little pressure as possible to dispense the adhesive and maintain a constant forward motion of the cartridge pistons to minimize off-ratio dispensing. We recommend an 18:1 thrust ratio on the gun for smooth dispensing.

Here’s to Your Seaming Success!

Using a quality dispensing gun and quality adhesives, storing them correctly and following the simple procedures outlined above will result in a flawless seam most every time. If the viability of your adhesive is ever in doubt, simply run a ¼” diameter test bead on some scrap cardboard for a couple of feet and look for slow, uneven or incomplete cure results. Once you are certain you have live and performing adhesive, you’re fabrication process should go seamlessly!

Visit our Working With Solid Surface guide to learn more great fabrication techniques.

10 Qualities of a Great Solid Surface Adhesive Dispensing Gun

Solid surface adhesive dispensing guns have evolved to become an easy to use and essential part of fabricating solid surface. A few years ago the adhesive came in two separate containers. You then had to mix it together in a paper cup with a wooden stick, similar to a doctor’s tongue depressor.

After that you could spread the adhesive mixture onto the solid surface joint with a stick. It was a tedious, time consuming and messy process with plenty of opportunity for mixing ratio errors. If the correct amount of catalyst was added to the base component in the ratio of 10 base to one catalyst, and the temperature in the facility was right, then the adhesive would set (harden) in 20-30 minutes. In this case, the project could move along as planned.

If too much catalyst was added, then the set time would be shorter. However, the challenge in this case is that  you wouldn’t be aware of this until it started to set, making it too late to position the components. This would leave you with an excess of gelled adhesive that would have to be removed before the job could go forward.

If too little catalyst was added, the set time would be extended. In this instance you wouldn’t know it until the pieces were in place, forcing you to wait until the adhesive had set. This process could take hours, once again resulting in a project delay.

Adhesive guns have come a long way!

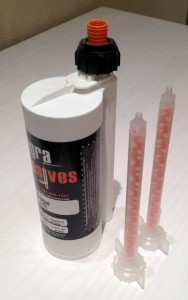
Today, almost every adhesive brand comes in a two cylinder cartridge. The larger cylinder holds 10 times more base component than the smaller cylinder that contains the catalyst. This is where the terminology 10:1 adhesive comes from. [See Photo 1]


Photo 1: Integra Adhesive 10:1 ratio adhesive cartridge and mixing tips.

This delivery design allows for the same ratio of adhesive to be dispensed, cartridge after cartridge. When you pull the adhesive gun trigger, the adhesive in the cartridge is applied directly to the solid surfaces to be joined. This results in a lower risk of project delays due to improper component ratios.

The Top 10 Qualities of New Solid Surface Adhesive Dispensing Guns

Now, let’s consider the top evolutionary qualities of the new solid surface adhesive guns and how they can positively impact the success of your project:

  1. Possesses a “dripless” feature so when you release the trigger (in order to squeeze the trigger again) the adhesive doesn’t run out.
  2. Fits 250ml adhesive cartridges from Integra, Sta-Put (Plexus), HI-MACS, Avonite®, Formica®, and Wilsonart® (Gibraltar) and others.
  3. Has a comfortable padded grip to help prevent hand fatigue.
  4. Possesses an 18:1 thrust ratio so you can use a moderate controlled hand pressure to make sure the adhesive flows evenly from the tip.
  5. Has twin precision gripping plates that carefully control the advancement of the pistons.
  6. Contains a “wear adjustment” screw to keep the gripping plates configured properly.
  7. Capable of dispensing high-viscosity solid surface adhesive.
  8. Has a thumb-activated rear lever to instantly stop dispensing when completed.
  9. Contains extra durable, heat-treated piston push-rods that resist wear and misuse.
  10. The durable cartridge cage is made of steel for long life.

How do these top 10 qualities fit into the task of seaming solid surface?

Lets take a look at the actual steps that promote a good bond and successful project:

  • First, cut and position the solid surface components so they are ready for the application of adhesive. (It also helps if the material is allowed to reach the temperature of 60 degrees or warmer.) [See Photo 2]


    Photo 2: Prepare the material and tooling.

  • Place the cartridge in the gun and pull the trigger to position the gun pistons correctly behind the cartridge.
  • Open the cartridge, and hold the gun at an upward slant with a paper cup under the cartridge openings. Pull the trigger so a small amount of materials are dispensed from both cylinders of the cartridge. (Make sure you see material flowing from both cylinders.)
  • Place the mixing tip in place and tighten the retaining nut to hold it there.
  • Pull the trigger so that adhesive flows through the mixing tip and onto a scrap piece of cardboard or into the cup. Dispense a blob about the size of a quarter to make sure it is flowing properly. [See Photo 3]


    Photo 3: Purge a small amount of adhesive to ensure a good mix.

  • Apply the adhesive to the materials to be joined. Lay down the bead of adhesive by pulling the gun tip toward you. [See Photo 4]


    Photo 4: Apply a 1/4″ bead of adhesive.

  • Infrequently, an air bubble that is trapped in the catalyst part of the adhesive is released into the mixing tube and the air (instead of catalyst) mixes in with the base component. As a result, this portion of the bead will lack the catalyst and will not cure or set. To prevent this from happening, add a second bead of adhesive to ensure that catalyst is available to all areas of the adhesive bead. It’s unlikely that air bubbles will occur at exactly the same point twice.   (TIP: storing the cartridge in an upright position allows air bubbles to rise to the top and be expelled during the initial dispensing of material from the cartridge that is mentioned above)
  • Clamp the pieces together, let the adhesive set, and move on to the next steps for completing your project. [See Photo 5]


    Photo 5: Clamp the pieces together.

As you can see, the new adhesive guns have been optimized to make your solid surface projects easier and more effective. Here’s wishing you every success(!) and be sure to also visit our instructional guides for working with solid surface for more in-depth instruction.


With DuPont™ Corian® and Zodiaq®, David Bromstad Helps Homeowners Find Their Personality

Designer and TV personality David Bromstad is now the creative consultant for DuPont Corian® and Zodiaq®.

DuPont Building Innovations Reveals Design Personalities with David Bromstad to Encourage the Use of More Expressive Color in Home Design


WILMINGTON, Del., Oct. 3, 2013 /PRNewswire/ — Energetic and animated designer and TV personality David Bromstad is dropping his paint brush for a moment to infuse color in interior design through the use of beautiful and dynamic DuPont™ Corian® solid surfaces and DuPont™ Zodiaq® quartz surfaces.

Bromstad has worked with DuPont to design a fun quiz that will determine which one of seven distinct design personalities match a homeowner’s style to help in their quest to create personalized, inspiring kitchens and bathrooms using DuPont™ Corian® and Zodiaq® surfaces.

“Homeowners typically have one chance to design their kitchens and bathrooms, which are among the most used spaces in a home,” said David Bromstad. “Our design tools help to make it easier and more rewarding by introducing homeowners to their design personality and giving them a color palette to work with.”

After answering a few simple questions through a visual quiz, users are introduced to one of seven design personalities that best resonates with their style. Design personalities include:

  • The Collector: Every piece in her home tells a story. The Collector mixes textures from found objects with more classic styles for a palette based on rich browns and dark lichen. Light is brought in by sunshine yellow and soft greens.
  • The Socialite: The Socialite knows confidence is her best accessory. She’s self-assured at home and at work – always leading by example. Lighter grays and warm tones of sand are balanced by rich, jet black to create a feeling of luxury and longevity.
  • The Multi-tasker: The Multi-Tasker approaches life at full force – balancing and adjusting to the moment to meet it with exuberance. A family-friendly palette that is fresh, realistic, modern and classic – and infused with a much-needed jolt of coffee.
  • The Entertainer: With an eye for modern sophistication, the Entertainer is comfortable no matter where he is – which is usually at the center of any situation. Graphic red and black contrast for a high-end feel, but are softened with warm taupe and golden yellow for a truly sophisticated theme.
  • The Creator: The Creator loves anything quirky; what most people shy away from, he embraces. Mixed media, textures and inspirations make the color palette. From pairing water blues with coffee browns, this is experimentation at its bravest.
  • The Naturalist: The Naturalist feels most at home in the great outdoors and strives to bring a sense of well-being into her home. Soft buttery browns complement light beige and cream tones while speckle textures commonly found in stone and granite inspire solid surfaces.
  • The Traveler: The world is his inspiration. The Traveler mixes the best objects found in his travels – things that have an international significance to his life – to create a multi-cultural lifestyle. Anything exotic and unique is his normal; pottery clay, cobalt and indigo his color palette.


DuPont Building Innovations is a driving force in the transformation of the building and construction industry through its use of building and materials science to solve emerging needs and create value for its commercial and residential customers. The company maintains its industry-leading position by applying innovative thinking to the development of energy-saving weatherization systems and beautiful and long-lasting surfacing solutions. DuPont Building Innovations’ best-known products and premier brands include: DuPont™ Corian® solid surfaces, DuPont™ Zodiaq® quartz surfaces, DuPont™ Tyvek® Weatherization Systems and a broad portfolio of garden and landscaping products.

DuPont (NYSE: DD) has been bringing world-class science and engineering to the global marketplace in the form of innovative products, materials, and services since 1802. The company believes that by collaborating with customers, governments, NGOs, and thought leaders we can help find solutions to such global challenges as providing enough healthy food for people everywhere, decreasing dependence on fossil fuels, and protecting life and the environment. For additional information about DuPont and its commitment to inclusive innovation, please visit http://www.dupont.com.

Like Corian® on Facebook at Corian® Design and follow them on Twitter @coriandesign.

###
The DuPont Oval Logo, DuPont™, The miracles of science™, Tyvek®, Corian® and Zodiaq® are registered trademarks or trademarks of DuPont or its affiliates. Only DuPont makes Corian® and Zodiaq® surfaces.

5 Things You Never Knew You Could Do With Corian® or Solid Surface

Bend It, Curve It, Twist It, Round It, Shape It…

Need a curved backsplash or solid surface countertop, a rounded shower stall, or a tub with a recessed soap dish or shampoo holder? Have you come against a situation where you need to bend solid surface materials around an odd corner or curved wall? Or perhaps you want to set your creative juices to work on a flowing design that includes free-form waves or columns? …No problem. Thermoforming is your answer!

What’s Thermoforming?

In the simplest terms, thermoforming is a process of heat-shaping synthetic material. And one of the greatest advantages of many solid surface materials is their ability to be heat-shaped in relatively few steps.

Innovative solid surface materials like Corian®,  LG HI-MACS®, Samsung Staron®, Wilsonart™ Solid Surface, Formica™ Solid Surface, Hanwha Hanex®, Avonite®, Meganite, and Mystera (to name a few) now offer the greatest flexibility (excuse the pun!) to make your creative vision come to life. What was once a complicated and time-consuming process through the carving, chiseling, or steaming and bending of materials like stone, granite or wood, is now made easier. Flexible when heated, these solid surface materials can be thermoformed into many shapes. With the proper heating elements and molds—dictated by the size and outcome of the project you are attempting—you can now bend, curve, twist, round-out and shape many solid surface materials into the desired contour within minutes.

People Prefer Curved Contours…

Incorporating curved features into your designs can even result in a boost in the desirability of your product.  As it turns out, flowing curves are just as aesthetically pleasing and desirable in man made designs as they are in our natural environment… and science has proven it. In a study conducted at Harvard Medical School1, it was discovered that people gave visual preference to items with curved contours over sharp-angled contours.

What does this mean for you? Introducing curved contours into your work and surrounding environment can directly influence the preferences, first impressions, or overall comfort of anyone who sets eyes upon it!

Ready to start bending, curving, twisting, rounding, or shaping?

Check out the details of how to get it done and read more about the technical application of thermoforming in our “Working With Solid Surface Guide – How to Thermoform Solid Surface”.   Pay particular attention to the one-of-kind thermoforming table contained within—the only resource of its kind where you can find comprehensive specifications for nearly every kind of solid surface material that exists at this time.

We look forward to hearing about your curved creations and experiences in the comment section below.

References

1 Bar, M., & Neta, M. (2006). Humans prefer curved visual objects. Psychological Science, 17(8), 645-648.