Monthly Archives: October 2013

How to Make (Corian®) Solid Surface Shower and Tub Walls

There are many compelling reasons to use Corian® or another solid surface material in your bathroom. These range from aesthetics, to ease of cleaning and its antiseptic properties, to its durable nature. And if that’s not compelling enough, did you know…if you’re like the average person, you will take a shower 7,300 times in your lifetime? That’s a lot of time spent in your shower space. If that’s not a compelling enough reason, we don’t know what is!

Mystera Solid Surface used for bathroom countertops, shower walls, and wainscoating.

Mystera Solid Surface used for bathroom countertops, shower walls, and wainscoting.

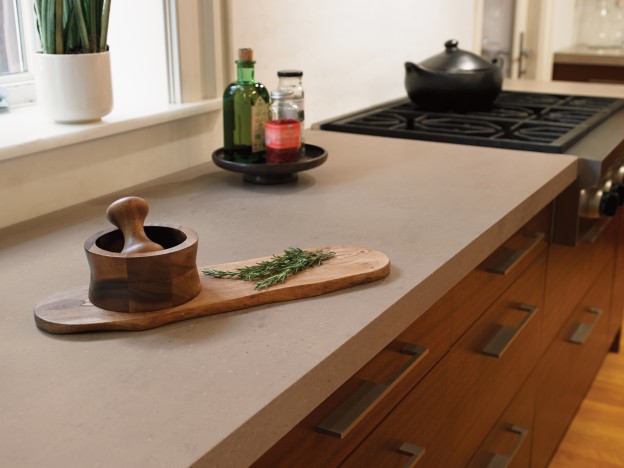
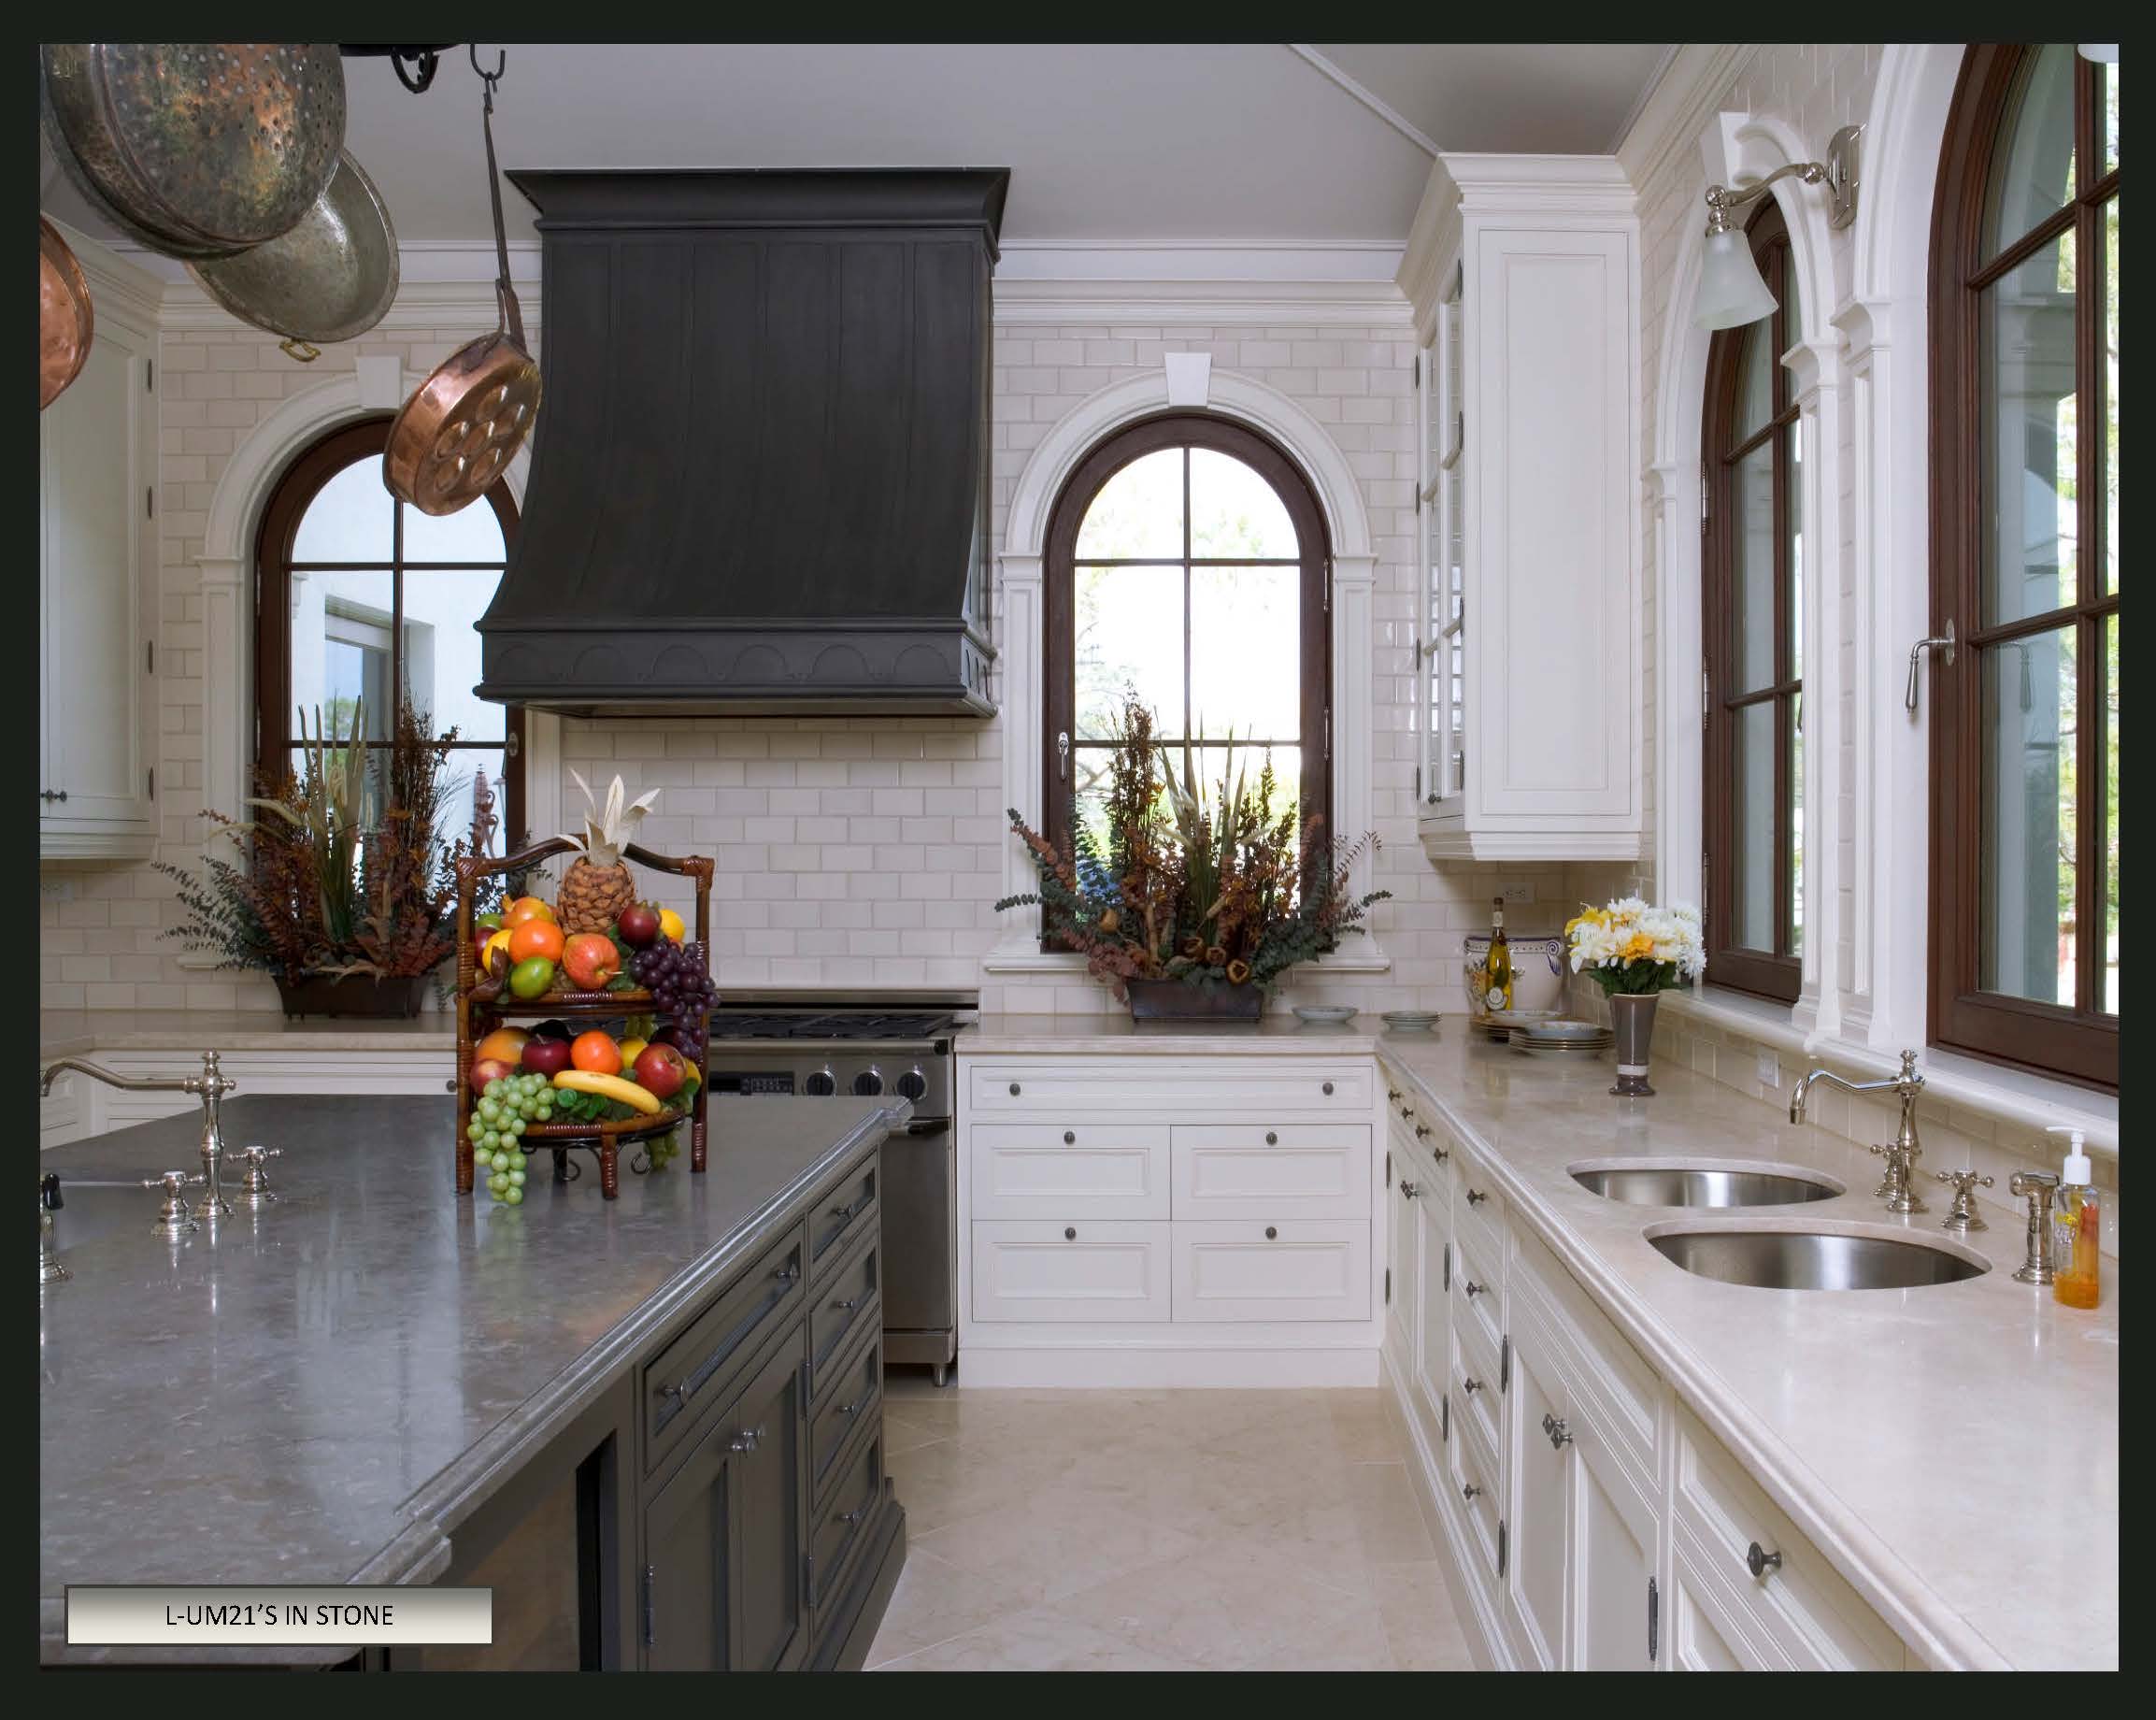
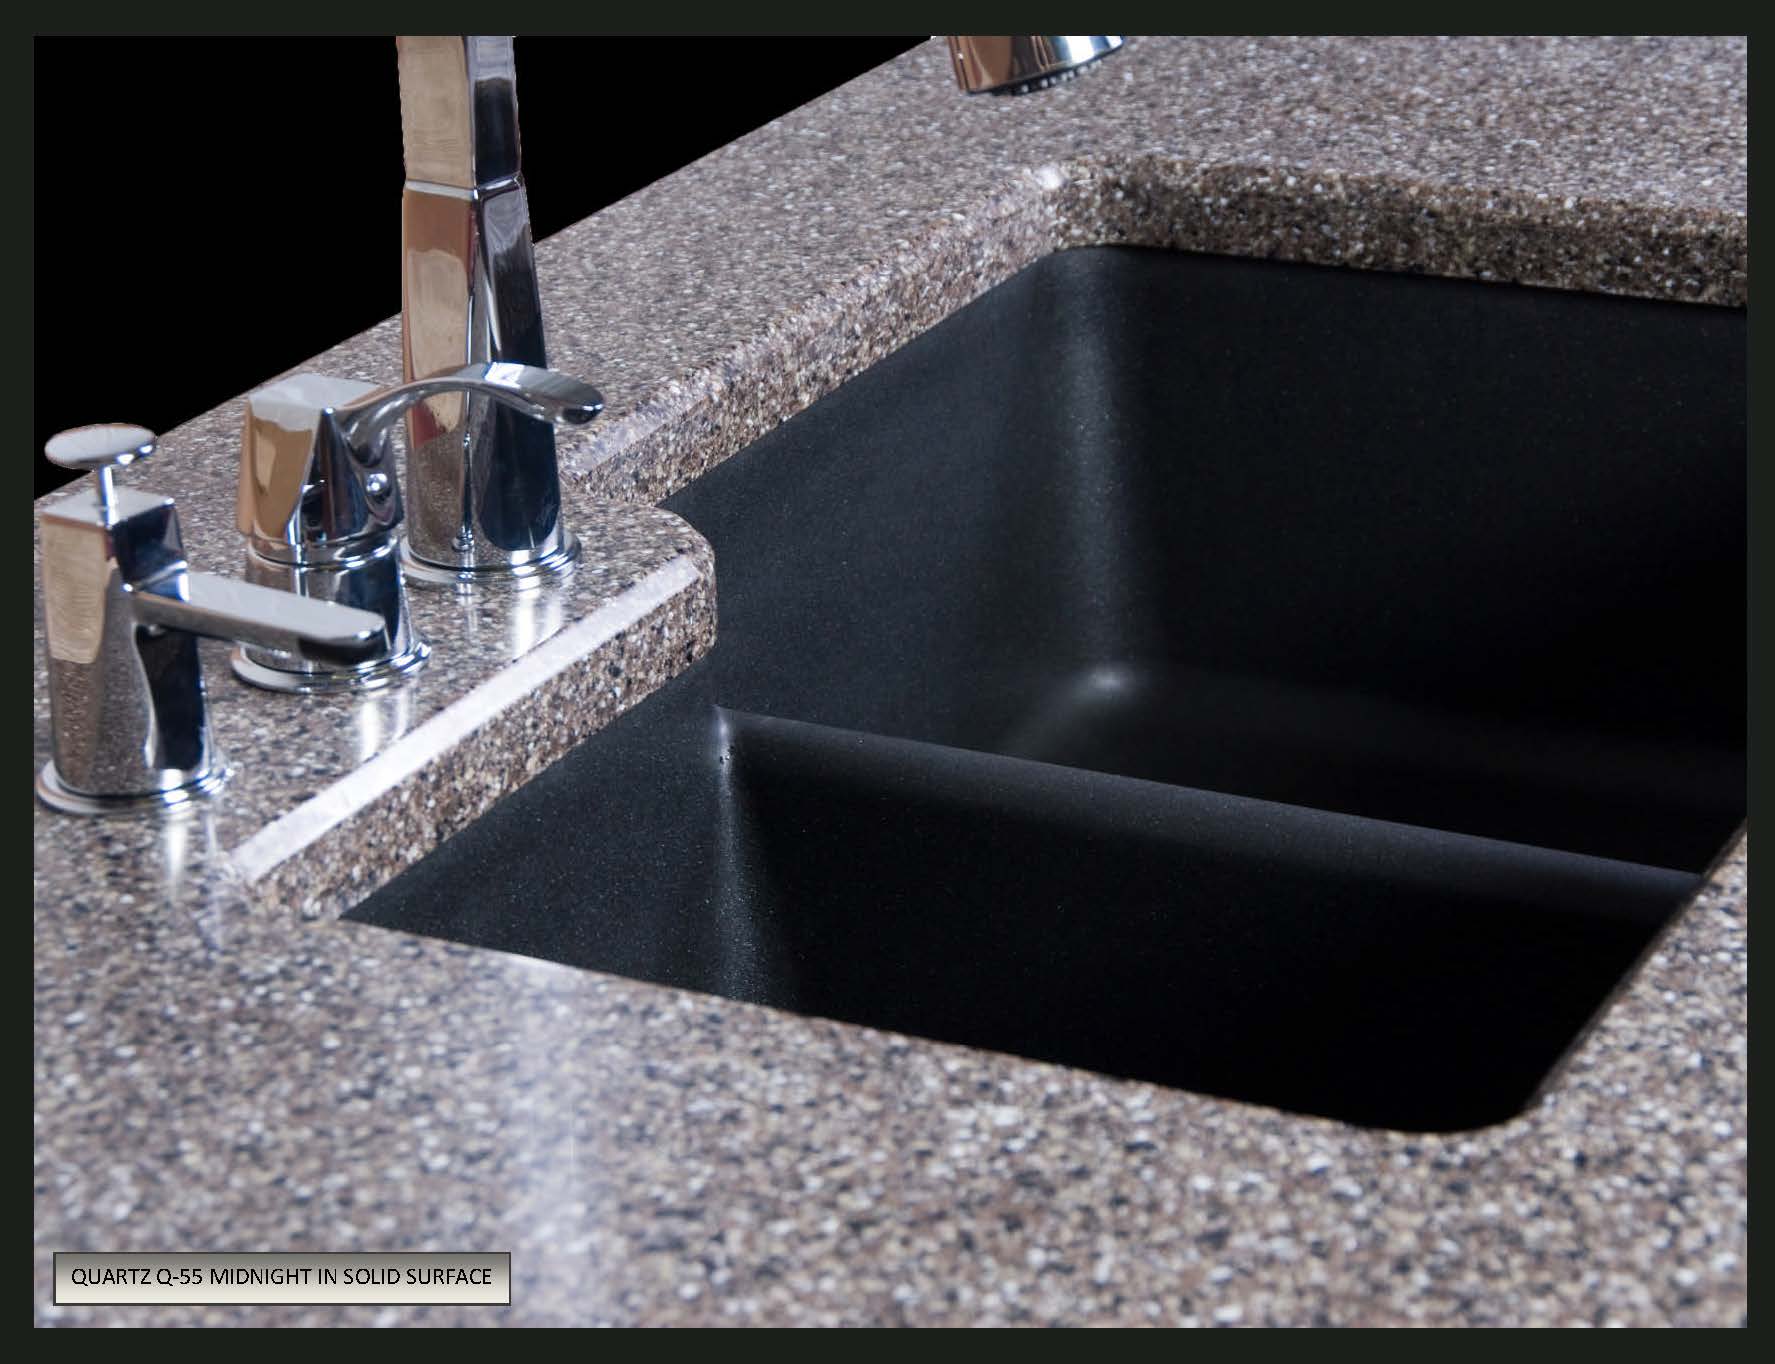
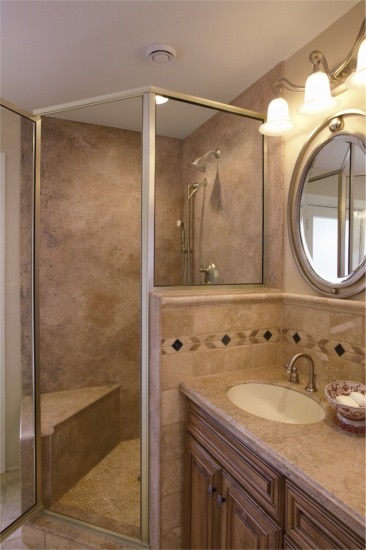
Corian® and solid surface material can be found in virtually any color and hue. There are solids, small and large particles and veined or swirled patterns to choose from (See Image 1. Example of veined product called Mystera.) It’s as simple as choosing that perfect color to adorn your walls from the lists of hundreds of solid surface colors available.

Cleaning solid surface is a breeze compared to tile, granite, cultured marble, natural marble and quartz. Tile has grout lines that can collect soap scum and mold and granite is porous and easily stained. Cultured marble possesses a gel coat finish that is vulnerable to scratches and natural marble can be eroded with acidic cleaners. You also need to be careful not to scratch quartz with abrasive cleaners. In sharp contrast, you can easily clean and remove stains and scratches from solid surface using cleaners like Comet and by simply using sand paper.

Durability is also a hallmark of solid surface materials.  It is nonporous and invites the use of both abrasive and chemical cleaners. This nonporous quality also effectively inhibits the growth of mold, mildew and bacteria, making it a perfect candidate for your shower or bath.

Installing Shower and Bathtub Walls (Surrounds)

So, you’ve decided to surround yourself with Corian® or another solid surface material for one or more of those “7,300” showers or baths that we mentioned previously. Now it’s time to get down to the nuts and bolts of installation.

Let’s start out determining how much material will be required.  For bathtub surrounds the long wall will need two sheets. Two sheets may be needed for the end walls as well, depending on the size of the tub enclosure. Showers may or may not need more than one sheet per wall, but most will likely have at least one wall that will. Shower and tub surrounds are usually made from 1/4″ solid surface material, but 1/2″ material can just as easily be used, it’s just not as flexible and heavier.

Since existing walls are not always square, it may be necessary to scribe a wall sheet in order to get a good fitting cornerRough cut the sheets with any type of saw and then route them to remove any rough areas left by the saw blades. Dry fit the sheets to see if adjustments to the edge of the sheet are needed.

Scribing is one of the key techniques for installing material against odd shaped or crooked walls for a perfect fit. Once a line is scribed using a pen and compass, it’s a simple matter of cutting or sanding off the excess material to create the correct fit. If the wall is narrower than 30″, use a narrower, square sheet of material, scribe it, and then transfer the scribe to the actual piece.

Make sure to leave 1/8″ for expansion and contraction between sheets on the long wall(s), in the corners, and at the bottom. Cutouts for the faucets and other fixtures can be made with a router or hole saw. Finish off this part of the job by sanding the edges of these openings to remove any chips.

Dry fit the pieces and make any necessary adjustments. You can bond the solid surface material to any wall that is constructed out of water resistant drywall, cement board or the previous wall if it is sound and water resistant (but not particle board). Coat the surface with a white primer suitable for adhering properly to that type of surface to keep this wall from showing through the 1/4″ solid surface. For 1/2″ solid surface this is not as likely to happen.

Adhere the solid surface to the wall using 100% silicone sealer and some hot melt glue. Apply the silicone to the backside, one inch from the edge around the perimeter of the solid surface sheet. Dot the inner part of the sheet with thumb size daubs of silicone in a 12” grid pattern. Once the silicone is in place, apply the hot melt glue to the wall in several places (do not apply it to the solid surface, as it will set too fast.) This will help hold the sheet in place until the silicone dries. Quickly press the sheet in place and hold for a minute or two while the hot melt glue cools and sets.

Next, after cleaning with denatured alcohol, caulk all the horizontal and vertical seams with color matched silicone. [Pro Tip: In order to get a perfect looking caulked joint, apply the bead of silicone so that it fills the gap. Lightly spray the caulk in the joint with denatured alcohol and run you finger along it to smooth and remove excess caulk. Any excess can be removed with denatured alcohol on a clean white cloth.]

To create a different look other than exposed caulked seams, do the following:

    • Batten strip, or turn around and use as corner molding, for covering seams.  Adhere to wall with silicone.

      Batten strip, or turn around and use as corner molding, for covering shower wall seams. Adhere to wall with silicone.

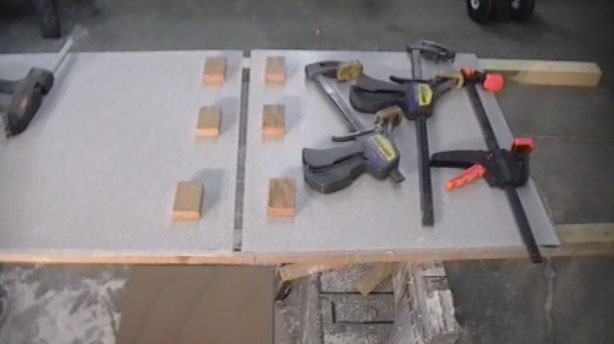
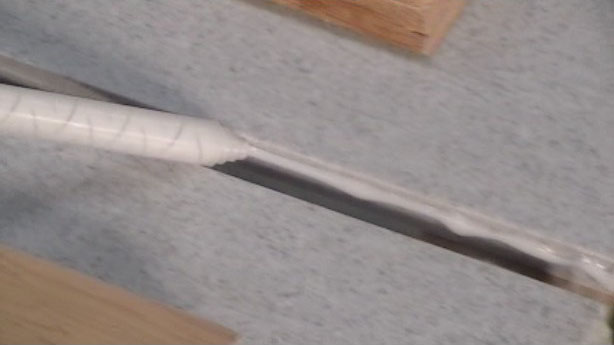
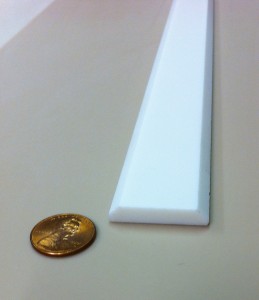
      Batten Strip—a batten strip made of 1/4″ or 1/2″ solid surface can be used to cover the seam in the long wall. It can be whatever width you like, but about 1-1/4″ to 1-1/2″ is good. Take a look at the batten strip from 1/4″ material in Figure 2 below. It has 45-degree bevels on the two edges that leave 1/16″ of the edge unbeveled. Place two small beads of silicone on the full length of the backside of the strip and position it over the seam and press it into place. You can use hot melt glue or tape to hold it in place. Remove any squeezed out adhesive with denatured alcohol on a white cloth.

    • Corner Moulding—use the exact same strip to cover the corner seams. Invert the strip in the corner so it spans the corner at a 45-degree angle.  Apply small beads of silicone the full length of the strip and press into place. Treat any adhesive squeeze-out as discussed above. Use tape to hold the moulding in place until the silicone sets.
    • Edge Trim— For 1/4″ thick walls, the trim to go around the top and sides can be created from 1/2″ thick solid surface. Cut a 1/4″ deep notch (rabbet) in a 1-1/4″ to 1-1/2″ wide strip of 1/2″ solid surface. Ease (round over) the outside corners and edges of the trim strips. Fasten the trim in place by using silicone on the part of the trim that laps over the sheet on the wall, as well as to the trim that butts against the original wall. Trim is not needed for a 1/2″ wall. Instead, use a router to create an edge profile or just ease the edge.
  • Invisible Seam—use a hard seam with color matched solid surface adhesive to create a seamless joint where multiple sheets of solid surface are being installed. There are two ways to approach creation of an invisible seam:
    • Cut them by using a mirror cut and then use a tongue and groove or a wavy edge seam router bit along the joining edges. Using one of these style bits will make it easier to align the two sheets when joining them with adhesive. This also reduces the amount of sanding needed to make the two sheets flush. Fasten this sheet to the wall by apply a large bead of silicone to the backside of the seam, in addition to the normally applied silicone detailed above.
    • Hard seam a backing strip of 2″-3″ to the back of one of the sheets. Leave half of the backing strip sticking out and make sure no adhesive remains on the portion sticking out. Notch the wall so the backing strip does not get in the way when the sheet is adhered to the wall. Once that sheet is in place, hard seam the second sheet in place. After you sand away the glue squeeze-out the seam should disappear. (NOTE: Do not hard seam corner joints since this will eliminate the space needed for expansion.)

Visit our Working With Solid Surface and SolidSurface 101 guides to learn more great fabrication techniques.

Formica Noce Travertine

Formica Corporation Introduces 13 New Patterns to Solid Surfacing Collection

Formica Corporation, a global leader in surfacing design and innovation, has introduced 13 new Formica solid surfacing patterns, adding a new range of quartz-like patterns and some contemporary shimmer to the brand’s collection of smooth, seamless and nonporous solid surfacing products.

“We first introduced the Colorbox concept in 2010 to visually demonstrate how different surfacing materials, colors, textures and patterns can work together in commercial interiors”

Formica Corporation’s design team styled the latest patterns to coordinate with a variety of Formica® brand surfacing products, a concept dubbed Colorbox. “We first introduced the Colorbox concept in 2010 to visually demonstrate how different surfacing materials, colors, textures and patterns can work together in commercial interiors,” said Gerri Chmiel, Formica Corporation’s senior design manager. “The Colorbox concept allows the architecture and design community to confidently pair Formica® Solid Surfacing products with complementary high pressure laminate offerings.”

The 2013 Formica® Solid Surfacing introduction includes:

Luna – A small-scale, usable quartz-like pattern available in a full color range to coordinate with the brand’s recent high pressure laminate introductions.

  • 773 Luna Sail White – soft, warm white
  • 774 Luna Fossil – pale blue-green
  • 775 Luna Storm – cool, dark gray
  • 780 Luna Stone – mid-tone, warm taupe
  • 781 Luna Concrete – mid-tone, cool gray
  • 782 Luna Weather – dark, warm gray

Quartz – A larger-scale, quartz-like pattern with metallic particulates for added shimmer and depth.

  • 770 Bottle Glass Quartz – inspired by the colors of recycled glass, the bright white ground features large particulates of blue, brown and gray
  • 771 Café Quartz – soft caramel with large blue, translucent and metallic copper particulates
  • 772 Copper Quartz – warm gray with large white, gray and metallic copper particulates

Sparkle – Subtle, reflective white and gray architectural colors provide a contemporary alternative to basic solids.

  • 778 White Sparkle – warm white with a metallic dusting of cool silver mica
  • 779 Gray Sparkle – cool gray with a metallic dusting of cool silver mica

Travertine – Softly patterned Noce Travertine remains a staple in commercial and residential interiors alike, but the softness of the stone renders it difficult to use on horizontal surfaces. Noce Travertine offers the look of real travertine, with the durability of Formica® Solid Surfacing.

  • 777 Noce Travertine – a perfect blend of warm and cool; warm brown ground swirls with veins of cool gray and dark brown; gray and white particulates add interest and depth

Mirage – Tried and true speckled pattern introduced in new trend color of gray; rust brown warms the overall color

  • 773 Mirage – gray with warm rust-brown particulates

Chmiel revealed that the practice of mixing and matching of materials in commercial settings plays an important role in the company’s product development process. “One project incorporates countless surfacing materials, and we strive to introduce trend-forward, usable products that are desirable on their own, yet work well in unison to help designers achieve a desired design aesthetic. The usability and compatibility of these 13 new patterns underscores our commitment of being a design resource for our customers.”

Formica® Solid Surfacing is GREENGUARD Indoor Air Quality Certified® by the GREENGUARD Environmental Institute under the GREENGUARD Standard for Low-Emitting Products, including the requirements for Children & Schools.

About Formica Corporation

Founded in 1913, Formica Corporation, part of the Formica Group of companies, is a leader in the design, manufacture and distribution of innovative surfacing products for commercial and residential applications. For more information about Formica Corporation, its products, special programs and promotions, visit www.formica.com or call 1-800-FORMICA™.

About Formica Group

Formica Group is a global group of companies consisting of Formica Canada Inc., Formica Corporation, Formica de Mexico S.A. de C.V., Formica IKI Oy, Formica Skandinavien AB, Formica Limited, Formica S.A., Formica S.A.S., Formica Taiwan Corporation, Formica (Thailand) Co., Ltd., Formica (Asia) Ltd. and Homapal GmbH, among others. The Formica Group of companies is part of the Laminates & Panels division of Fletcher Building.

Please Note: 
Formica®, and the Formica® Anvil Logo are registered trademarks of The Diller Corporation.
1-800-FORMICA™ and Etchings™ are trademarks of The Diller Corporation. 
©2013 The Diller Corporation 
A Fletcher Building Company

Contacts

For Formica Corporation Laura Phillips, 513-325-9985 lphillips@vehrcommunications.com

Tips for Successfully Seaming Corian® & Other Solid Surface Brands

Integra Adhesives

Integra Adhesives

Have you ever spent hours correctly measuring, cutting and fitting pieces of Corian® or other solid surface material together, only to have your seams fail? If you have, then you know how frustrating this can be!

How do you avoid this? The key is to keep your solid surface adhesive live and performing throughout the fabrication process. Here are some highly effective strategies for storing and applying adhesive to ensure the best possible performance and seaming success:

Adhesive Care

  • Store adhesive upright in a cool dry place that is away from direct sunlight.
  • Store adhesive in an air-conditioned room or a refrigerator designed for the storage of flammable products to extend its shelf life. (NOTE: Do not store adhesive alongside food.)
  • Store upright to allow any trapped air bubbles to reach the top (outlet) of the cartridge and be eliminated during the initial purge. To purge, hold the cartridge at an upward angle, mixing tip NOT attached, and dispense approximately a tablespoon into a disposable container like a paper cup. Make sure you see adhesive dispensing from both sides of the cartridge.
  • Do not use the adhesive if it has been exposed for an extended period to high temperatures during transport or storage. In this situation, the activator (catalyst) may break down and lose strength.
  • High temperature decomposition of the activator can also release gasses into the activator component, which may impact the consistency of the cure, leaving uncured spots.

If stored correctly the adhesive can last for a year. However, the activator portion will slowly lose reactivity over time. If in doubt, run a test by dispensing a ¼” bead on cardboard and if a slow, uneven or incomplete cure results, discard the adhesive.

In addition to properly caring for your adhesive, following these eight performance guidelines will help ensure successful seaming during your fabrication process:

Performance

  • Allow both the adhesive and solid surface sheet material being joined to reach a room temperature of at least 60 degrees Fahrenheit (18 degrees Celsius) before assembling.  Bringing material into a warm humid room after being cold can cause moisture to condense on the surface, which can interfere with bonding.
  • Fabricating cold sheets in a warm room will cause the adhesive on the edge of the joint to cure faster than the adhesive deep in the joint. This is because cold solid surface materials absorb a significant portion of the energy from the chemical reaction, resulting in less than optimal curing conditions. This can ultimately cause a weakening of the seams in those areas. It is best practice to let the sheets reach room temperature.
  • Another reason to allow cold adhesive to return to room temperature before use is that some adhesive components become thicker at low temperatures. This creates higher pressure that may flex the cartridge wall and throw off the mix ratio.
  • If you re-warm adhesive, make sure the cartridge outlet plug is in place rather than the mixing tip. Adhesive left in the tip will warm faster and may expand back into the activator chamber where the two components will harden and result in a plugged cartridge.
  • Never expose adhesive to high heat. Warming adhesive above 110 degrees Fahrenheit can damage the activator component.
  • When gluing pieces together, run two small beads (one over the other) instead of a larger single bead. Overlapping adhesive streams will greatly reduce the possibility of under cured areas caused by air bubbles, from the activator side of the cartridge, mixing in with the base component in place of activator.
  • Use the full stroke of the trigger to maintain a smooth and constant feed pressure. Quickly re-trigger the gun and continue this technique until dispensing is complete. This application technique will help to prevent adhesive from seeping out of the tip between strokes. Using a dripless adhesive gun is also beneficial.
  • Apply as little pressure as possible to dispense the adhesive and maintain a constant forward motion of the cartridge pistons to minimize off-ratio dispensing. We recommend an 18:1 thrust ratio on the gun for smooth dispensing.

Here’s to Your Seaming Success!

Using a quality dispensing gun and quality adhesives, storing them correctly and following the simple procedures outlined above will result in a flawless seam most every time. If the viability of your adhesive is ever in doubt, simply run a ¼” diameter test bead on some scrap cardboard for a couple of feet and look for slow, uneven or incomplete cure results. Once you are certain you have live and performing adhesive, you’re fabrication process should go seamlessly!

Visit our Working With Solid Surface guide to learn more great fabrication techniques.

10 Qualities of a Great Solid Surface Adhesive Dispensing Gun

Solid surface adhesive dispensing guns have evolved to become an easy to use and essential part of fabricating solid surface. A few years ago the adhesive came in two separate containers. You then had to mix it together in a paper cup with a wooden stick, similar to a doctor’s tongue depressor.

After that you could spread the adhesive mixture onto the solid surface joint with a stick. It was a tedious, time consuming and messy process with plenty of opportunity for mixing ratio errors. If the correct amount of catalyst was added to the base component in the ratio of 10 base to one catalyst, and the temperature in the facility was right, then the adhesive would set (harden) in 20-30 minutes. In this case, the project could move along as planned.

If too much catalyst was added, then the set time would be shorter. However, the challenge in this case is that  you wouldn’t be aware of this until it started to set, making it too late to position the components. This would leave you with an excess of gelled adhesive that would have to be removed before the job could go forward.

If too little catalyst was added, the set time would be extended. In this instance you wouldn’t know it until the pieces were in place, forcing you to wait until the adhesive had set. This process could take hours, once again resulting in a project delay.

Adhesive guns have come a long way!

Today, almost every adhesive brand comes in a two cylinder cartridge. The larger cylinder holds 10 times more base component than the smaller cylinder that contains the catalyst. This is where the terminology 10:1 adhesive comes from. [See Photo 1]


Photo 1: Integra Adhesive 10:1 ratio adhesive cartridge and mixing tips.

This delivery design allows for the same ratio of adhesive to be dispensed, cartridge after cartridge. When you pull the adhesive gun trigger, the adhesive in the cartridge is applied directly to the solid surfaces to be joined. This results in a lower risk of project delays due to improper component ratios.

The Top 10 Qualities of New Solid Surface Adhesive Dispensing Guns

Now, let’s consider the top evolutionary qualities of the new solid surface adhesive guns and how they can positively impact the success of your project:

  1. Possesses a “dripless” feature so when you release the trigger (in order to squeeze the trigger again) the adhesive doesn’t run out.
  2. Fits 250ml adhesive cartridges from Integra, Sta-Put (Plexus), HI-MACS, Avonite®, Formica®, and Wilsonart® (Gibraltar) and others.
  3. Has a comfortable padded grip to help prevent hand fatigue.
  4. Possesses an 18:1 thrust ratio so you can use a moderate controlled hand pressure to make sure the adhesive flows evenly from the tip.
  5. Has twin precision gripping plates that carefully control the advancement of the pistons.
  6. Contains a “wear adjustment” screw to keep the gripping plates configured properly.
  7. Capable of dispensing high-viscosity solid surface adhesive.
  8. Has a thumb-activated rear lever to instantly stop dispensing when completed.
  9. Contains extra durable, heat-treated piston push-rods that resist wear and misuse.
  10. The durable cartridge cage is made of steel for long life.

How do these top 10 qualities fit into the task of seaming solid surface?

Lets take a look at the actual steps that promote a good bond and successful project:

  • First, cut and position the solid surface components so they are ready for the application of adhesive. (It also helps if the material is allowed to reach the temperature of 60 degrees or warmer.) [See Photo 2]


    Photo 2: Prepare the material and tooling.

  • Place the cartridge in the gun and pull the trigger to position the gun pistons correctly behind the cartridge.
  • Open the cartridge, and hold the gun at an upward slant with a paper cup under the cartridge openings. Pull the trigger so a small amount of materials are dispensed from both cylinders of the cartridge. (Make sure you see material flowing from both cylinders.)
  • Place the mixing tip in place and tighten the retaining nut to hold it there.
  • Pull the trigger so that adhesive flows through the mixing tip and onto a scrap piece of cardboard or into the cup. Dispense a blob about the size of a quarter to make sure it is flowing properly. [See Photo 3]


    Photo 3: Purge a small amount of adhesive to ensure a good mix.

  • Apply the adhesive to the materials to be joined. Lay down the bead of adhesive by pulling the gun tip toward you. [See Photo 4]


    Photo 4: Apply a 1/4″ bead of adhesive.

  • Infrequently, an air bubble that is trapped in the catalyst part of the adhesive is released into the mixing tube and the air (instead of catalyst) mixes in with the base component. As a result, this portion of the bead will lack the catalyst and will not cure or set. To prevent this from happening, add a second bead of adhesive to ensure that catalyst is available to all areas of the adhesive bead. It’s unlikely that air bubbles will occur at exactly the same point twice.   (TIP: storing the cartridge in an upright position allows air bubbles to rise to the top and be expelled during the initial dispensing of material from the cartridge that is mentioned above)
  • Clamp the pieces together, let the adhesive set, and move on to the next steps for completing your project. [See Photo 5]


    Photo 5: Clamp the pieces together.

As you can see, the new adhesive guns have been optimized to make your solid surface projects easier and more effective. Here’s wishing you every success(!) and be sure to also visit our instructional guides for working with solid surface for more in-depth instruction.


How to Choose a Sink For Solid Surface Countertops

Karran Seamless Undermount Stainless Steel - Dual Single Bowls

Karran Seamless Undermount Stainless Steel – Dual Single Bowls

Feeling overwhelmed by all of the sink options available? Well, it’s time to take a deep breath and relax. We’re here to help you focus your decision and hone in on the sink material and style that will fit your needs best for your Corian® or other brand of solid surface countertop.

To start, take a moment to consider what’s most important to you with regard to the new sink you are going to install in conjunction with your solid surface countertops. Where is your sink going to be placed—in a kitchen, bathroom, wet bar, laundry or even laboratory? Is your decision driven by design and aesthetics? Is it based on the fact that you want a new sink that is going to be durable and stand the test of time? Or perhaps an antiseptic environment and ease of cleaning are your prime outcomes?

It’s important to focus on what benefits are most important to you and what takes priority as you design your parameters.

We’ve identified three key considerations when choosing your new sink: the type of sink, whether or not to top mount or undermount it, and if undermounting it, whether or not to do a seamless undermount.

Time to pick your basin!

Type of Sinks Available

There are currently four types of materials that sinks are constructed from: solid surface, stainless steel, granite or quartz composite and cast iron. Pros and cons arise with each option available, such as cost, durability, aesthetics and antiseptic properties. Consider the pros and cons of each type.

Solid Surface (Acrylic) Sinks

Karran Seamless Undermount Solid Surface

Karran Seamless Undermount Solid Surface

Solid surface sinks offer a wide range of benefits. According to the U.S. Department of Commerce (2000), they (along with other composite sinks) are rising in popularity and use. They are molded from an acrylic resin with added fillers and colors and are the same color throughout. Because of this, any chips or scratches can be sanded out without causing any permanent damage or marks. Similarly, although solid surface sinks can discolor after extended use, this discoloration can be easily removed by scouring the basin with a cleanser, like Comet.

From a décor standpoint, standard solid surface sinks are currently offered in a handful of colors, like white, off-white and bone, to name a few. If color is a factor in your sink choice, then you might consider quartz. For the more design-adventurous, solid surface sink basins can also be creatively developed through thermoforming at the manufacturer.

Solid surface sinks, undermounted to your solid surface countertop using a seamless undermount approach (see below), are one of the most hygienic sink options available; meeting NSF 51 food equipment sanitation certification standard for “Splash Zone” and “Food Zone” applications. While this approach is not technically “seamless”, it is a bonding process that causes the two surfaces to come together so there is no support for the growth of bacteria and mold and no water penetration.

Lastly, if high heat is a factor in your sink usage, you might want to consider a stainless steel or cast iron option.

Granite or Quartz Composite Sinks

Karran Quartz Undermount Sink

Karran Quartz Undermount Sink

Also a composite, granite sinks are molded using ground up quartz pieces, quartz dust and acrylic resins and is the same color throughout. Similar to solid surface sinks, granite can also discolor with extended use. Although you can scour the surface and remove minor stains, excessive abrasion can lead to non-removable scratches.

Granite composite sinks are offered in a wide range of color options, with unique design features. This allows you to choose from a wide range of color contrasts, grains and patterns.

Cast Iron (Porcelain Enamel) Sinks

Cast iron sinks have a glass (also called porcelain enamel) surface, which is applied to the cast iron or steel basin and then fired at high temperatures. The glass color layer sits on top of the cast iron or steel. This glass layer is offered in a wide range of colors—such as black, brown, blue, gray, red and white, etc—based on the manufacturer’s options. It’s also important to note, the porcelain enamel surface can scratch and chip, which is non-repairable.

Stainless Steel Sinks

Karran Stainless Steel Seamless Undermount Double Kitchen Sink

Karran Stainless Steel Seamless Undermount Double Kitchen Sink


Stainless is made from different thicknesses of stainless steel (usually 18 gauge but can range from 16 to 23 gauge) Remember, the lower the gauge (thickness), the more durable the sink will be. Scratches can be removed or masked by using abrasives such as sand paper or steel wool. Always be mindful to go “with the grain.” All previous styles (solid surface, granite and cast iron) can chip, whereas stainless will dent permanently.

In general, stainless steel is a rugged, durable material. And, when it comes to antiseptic properties, stainless steel can also meet NSF 51 certification.

Top Mount (Drop-In) or Undermount?

Karran Stainless Steel Seamless Undermount Vanity Bowl

Karran Stainless Steel Seamless Undermount Vanity Bowl

Ease of Use – Top mounted sinks create a lip or edge, which prevents the easy sweeping of countertop debris into the sink while undermounted do not. Installing a top mounted sink will require caulking around the edge between the lip of the sink and the countertop. This prevents water from running under the rim.

Food Safety and Hygiene – Because of the caulking requirement, top mounted sinks provide a location for bacteria and mold to reside. Undermounted sinks also produce a seam that needs to be caulked and cleaned regularly.

Undermount Sinks – Standard or Seamless?

Karran Undermount Stainless Steel Sinks

Karran Stainless Steel Seamless Undermount

There are two types of undermount sinks—seamless, and one where the edge of the countertop extends beyond the inner edge of the sink, creating a visible joint.

In the typical undermount installation where the seam is visible, the sink can be glued or mechanically fastened under the countertop or both. The weight of the sink will dictate the method of installation, based upon the manufacturers recommendation. The joint between the top and bowl (on the sink bowl side) is typically sealed with silicone or caulk. Keep in mind that this area will need to be routinely cleaned to prevent the growth of bacteria and mold.

Karran Stainless Steel Seamless Undermount

Karran Stainless Steel Seamless Undermount

A seamless undermount is where the bond between the sink and the countertop is completed using an acrylic-based adhesive that hardens into a non-porous surface. The area of the seam is then routed and sanded so the countertop surface flows together with the sink surface. When the countertop and sink are the same color this joint is virtually invisible.

Solid surface and Karran stainless steel sinks can both be undermounted seamlessly. All types (granite and cast iron included) can all be undermounted in a non-seamless fashion.

Ease of Use & Hygiene – Seamless undermount sinks are easier to maintain and keep the most hygienic since there is not a caulk line to trap debris, bacteria and mold. This is an important consideration for sinks being placed in food preparation areas, dental and medical offices and other areas where an antiseptic environment is desired.

Learn how to install the various types of sinks in our Countertop Fundamentals instructional guides.  Sinks, sink adhesives, mounting kits and other sink accessories can all be purchased at SolidSurface.com.